The novel coronavirus has put our nation on pause. We know that the virus can spread between people interacting in close proximity—by speaking, coughing, or sneezing—even if those people are not exhibiting symptoms. In an effort to slow the spread of the virus, the CDC recommends wearing cloth face coverings in public settings where social distancing is difficult to maintain, such as the grocery store. A mask is also essential if someone in your home contracts the virus.
If you can do a straight stitch on a sewing machine, you can make yourself a cloth mask with a removable filter pocket for additional protection. Read below for step-by-step directions, a video tutorial, and downloadable patterns in sizes X-Small-Large. You can click on the images to pull up a larger copy of the picture.
These instructions have been supplied by Julia Varnedoe. If you are interested in making more of these masks and would like them to be delivered to hospitals in the local Atlanta area please place them in a clean ziploc bag. Write your name and how many masks there are on the bag. Use the button on the right to contact Julia for pickup.
Contact for mask Pickup
Materials
- 9″ x 15″ fabric for outer layer – Polyester or Poly/Cotton9″ x 15″ cotton fabric inner layer
- 9″ x 15″ fabric for lining – 100% Cotton
- Non Woven Polypropylene Shopping bag for filter (Should have a fabric type feel on both sides and be “breathable” – not shiny)
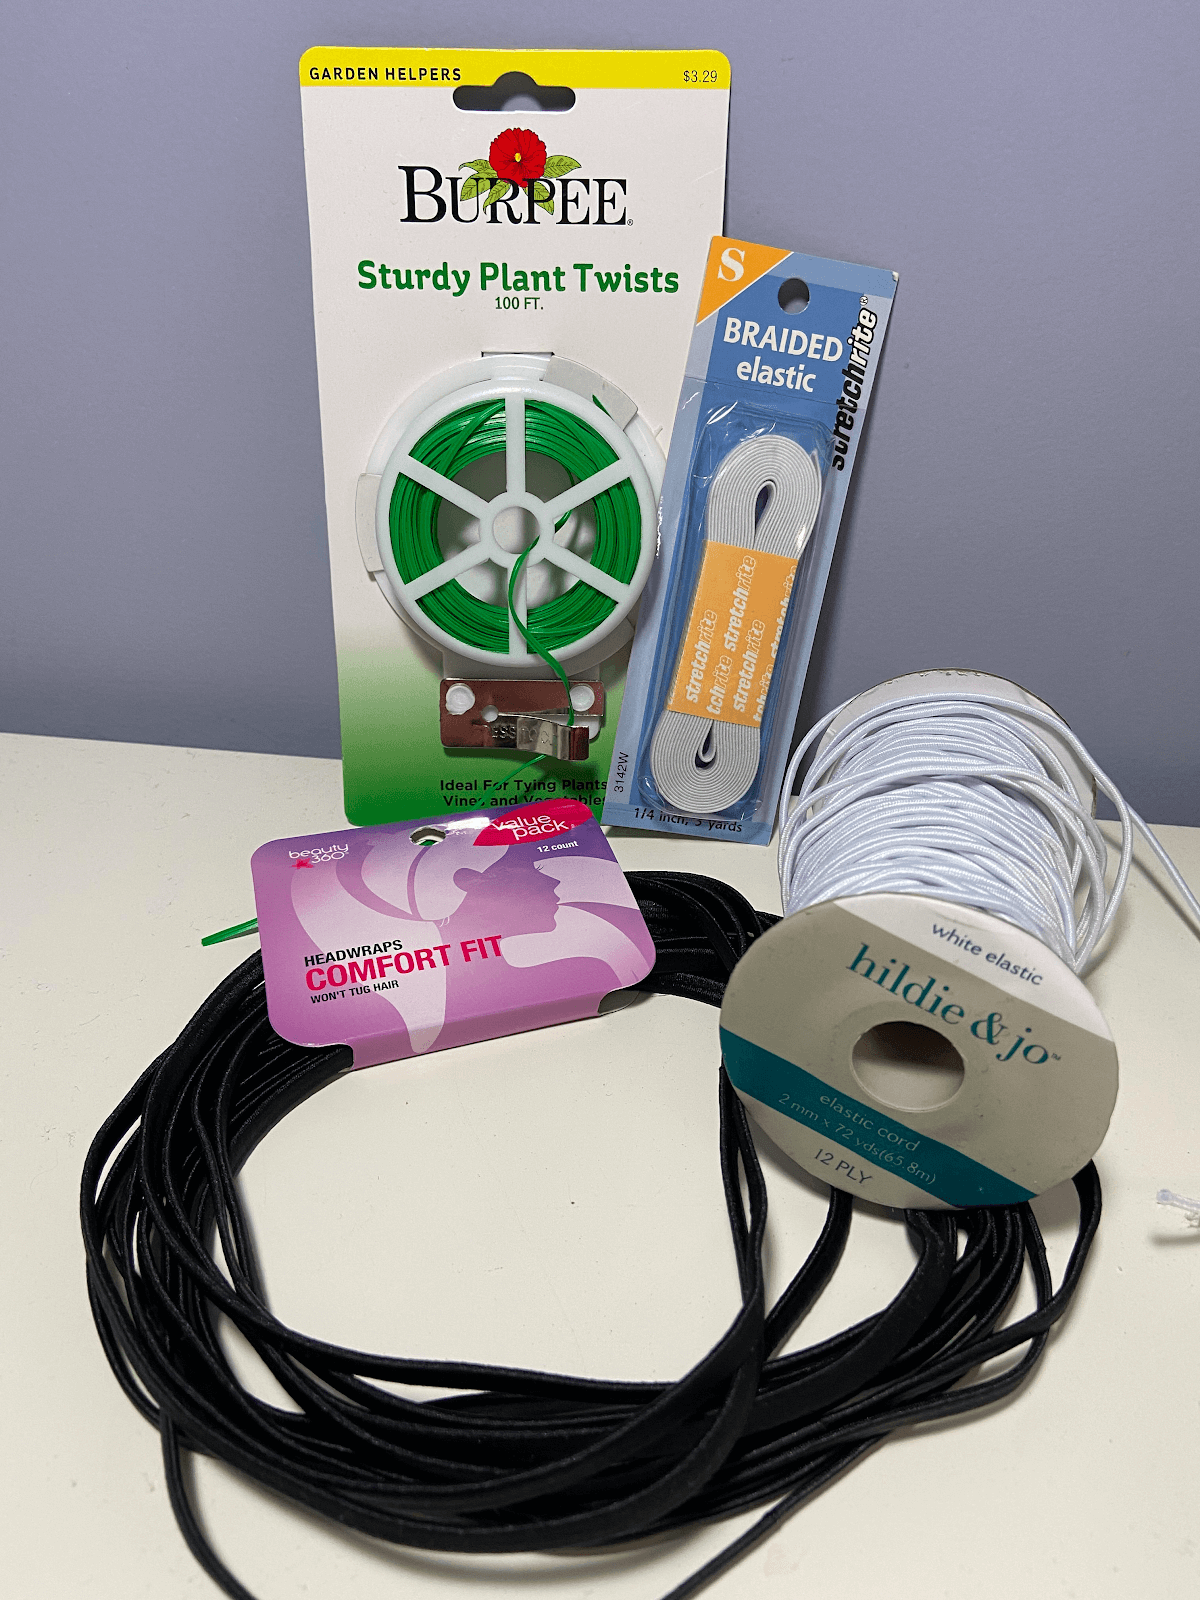
- 3-4” piece of soft wire (Plant twists, twist ties, soft wire,or paper clip)
- 18-20” of elastic cord, ¼” elastic, headwrap, or rubber bands
What kind of Fabric?
Recycle an old button down shirt! Most have fabric content labels on them and you can get several masks out of each shirt. Any tightly woven, non stretch Polyester or Poly/Cotton fabric is best at repelling droplet particles (hold it up to the light to see the weave). If you don’t have this, use any tightly woven cotton fabric. A different color lining will help you to identify the right of the mask. Machine wash and dry fabrics before sewing to pre-shrink, and to assure you are working with the most sanitary materials possible.
Repurpose a polypropylene shopping bag for the removable filter. These bags have a fabric type feel and are breathable. They can be removed and machine washed, but should be air dried to last longer. The filter will add some stiffness to the mask, which enables it to sit away from the mouth and nostrils. It’s also very easy to cut and sew.

Step One – Cut the pattern and fabric
Download and print out the pattern size you need.
Don’t scale the printing, it is in letter size paper (8.5″ x 11″) so you should have no problem printing it in full scale. There is a 1 inch cube on the page to ensure that the pattern has printed out at the right scale.
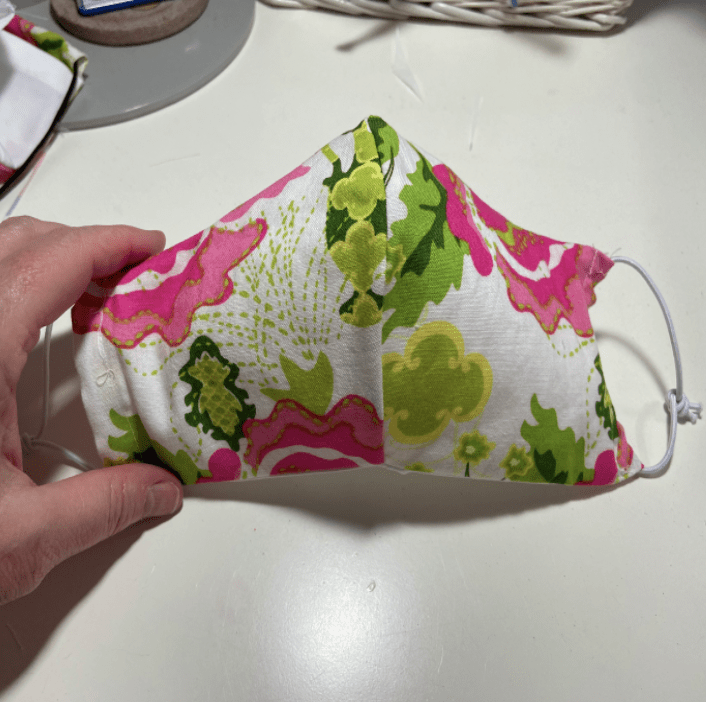
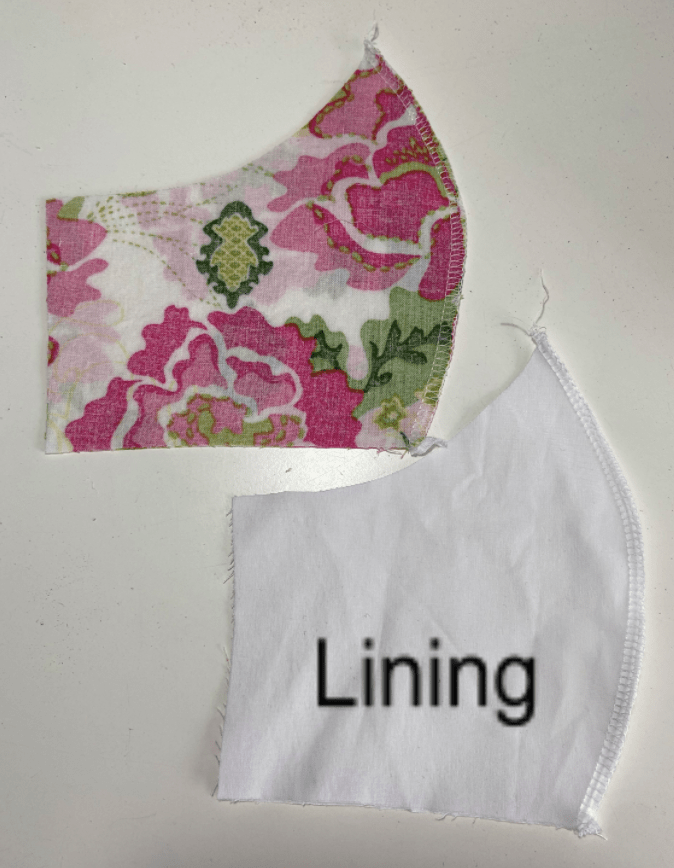
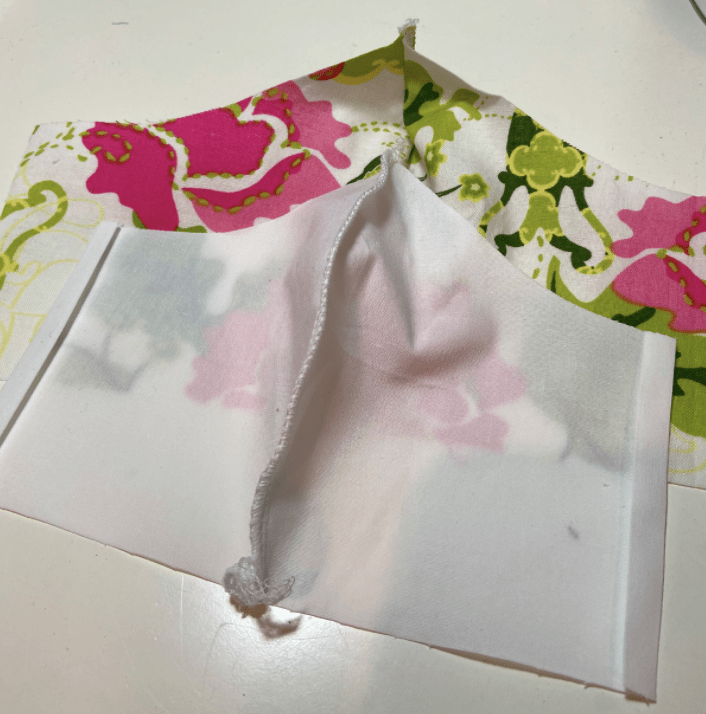
Cut out Pattern pieces and place on fabric. Pin pattern to fabric folded right sides together. You will cut two A (Outer) pieces, two B (Lining) pieces, and 2 C (Filter) pieces. We recommend that you use different fabrics for the inner and outer mask materials so that they are easy to tell apart.
Step Two – Stitch the Curved Seam
With right sides together, stitch the curved seam on both the outer fabric and lining using a ¼ inch seam allowance. Carefully clip the seam if needed at ½ inch intervals close to the seam line. Be careful to avoid clipping the seam (if you do, just stitch another seam close to your original seam)
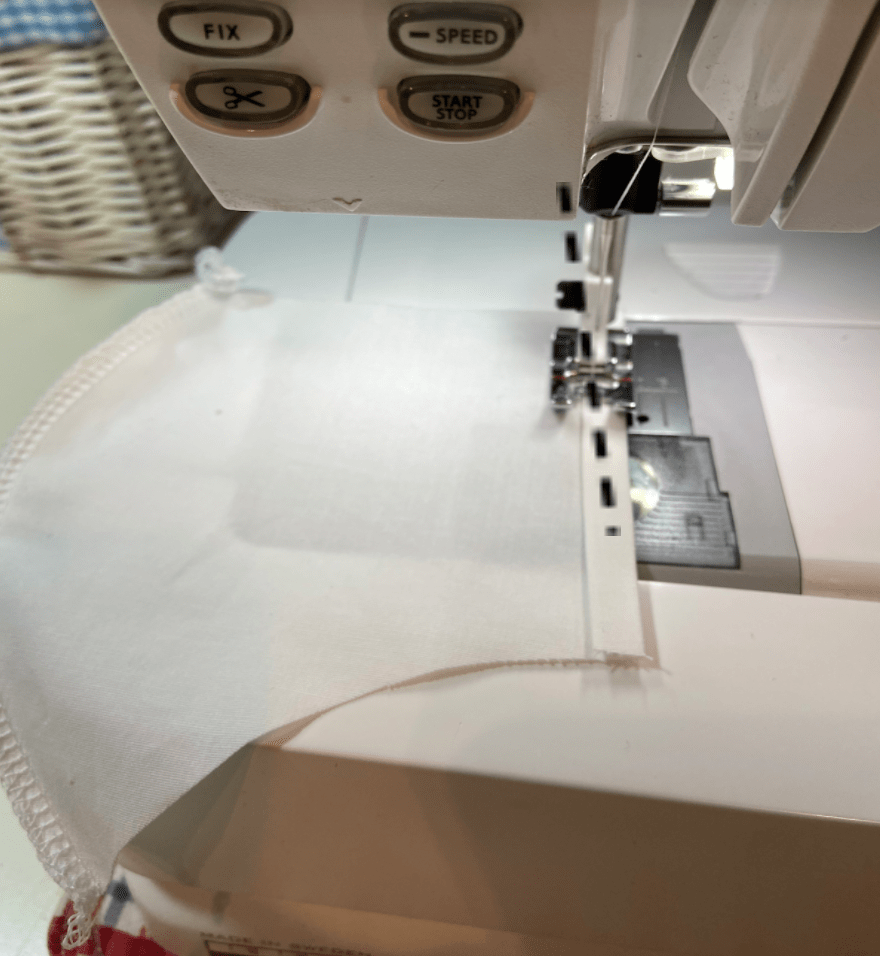
Step Three – Press Sides of Lining
Open up the lining. Fold straight sides of lining fabric ½ inch toward the wrong side and press with iron. Turn in again another ½ inch and press. Do this on both sides of the lining.
Step Four – Stitch Sides of Lining
Sew the fold down with a straight stitch close to the first fold line.
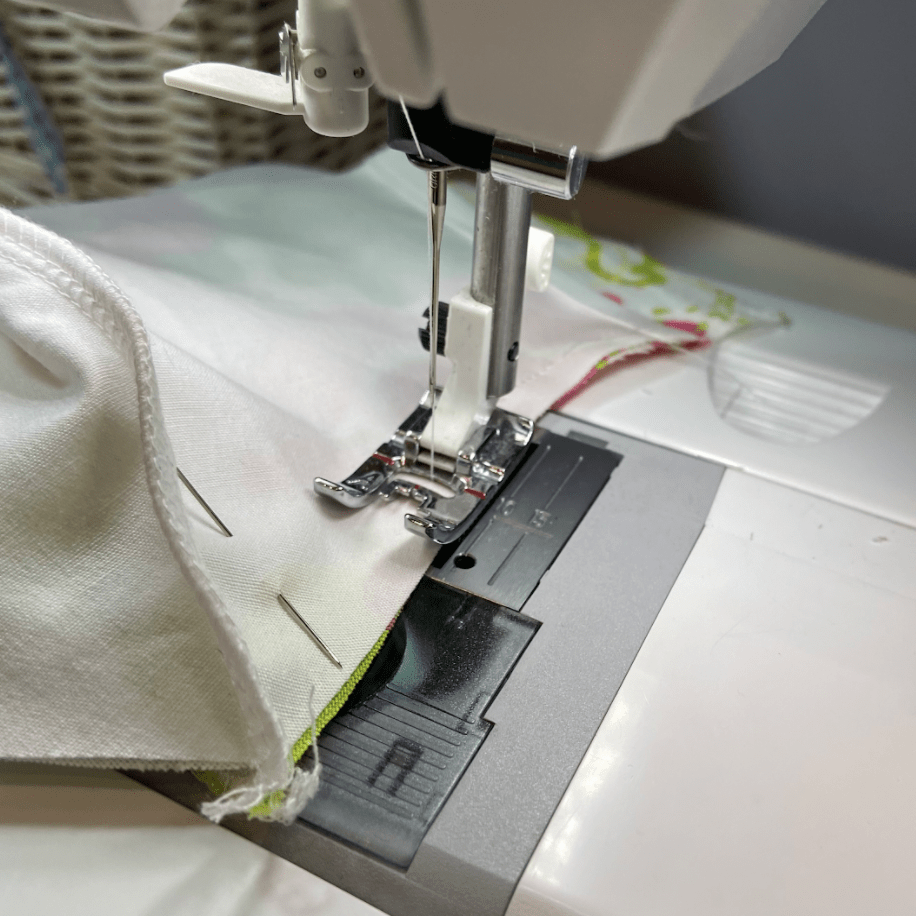
Step Five – Pin the lining to the outer layer along the TOP
Lay the lining on top of the outer layer, right sides together. Pin the top layers together.

Step Six – Stitch the lining to the outer layer along the TOP
Sew a ¼” seam along the top edge, pivoting at the point.
Step Seven – Pin the lining to the outer layer along the BOTTOM
Lay the lining on top of the outer layer, right sides together. Pin the bottom layers together, making sure to match the center seam.

Step Eight – Stitch the lining to the outer layer along the BOTTOM
Sew a ¼” seam along the bottom edge.
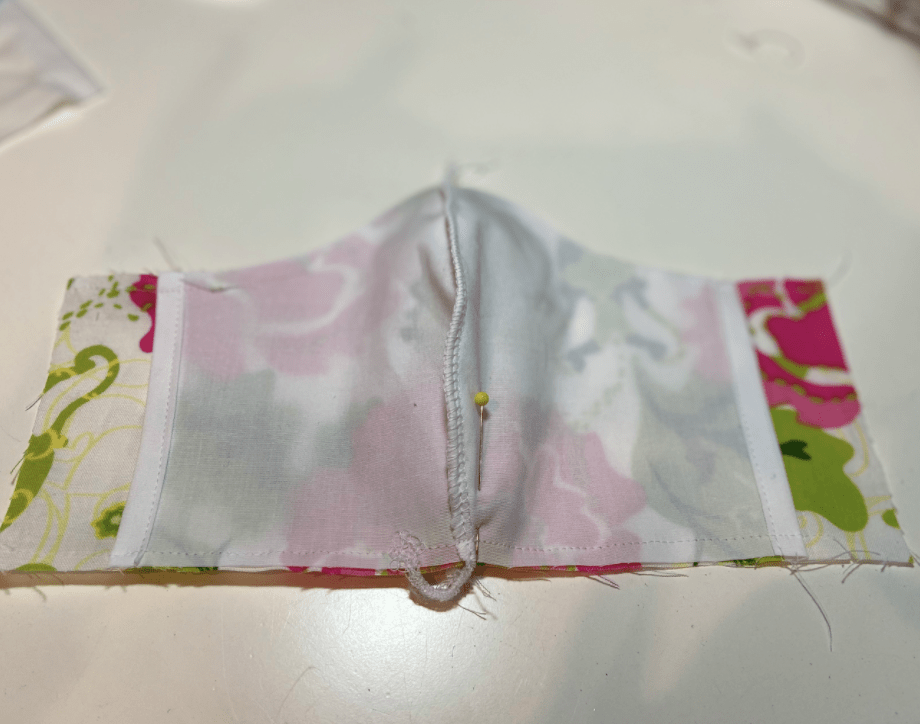
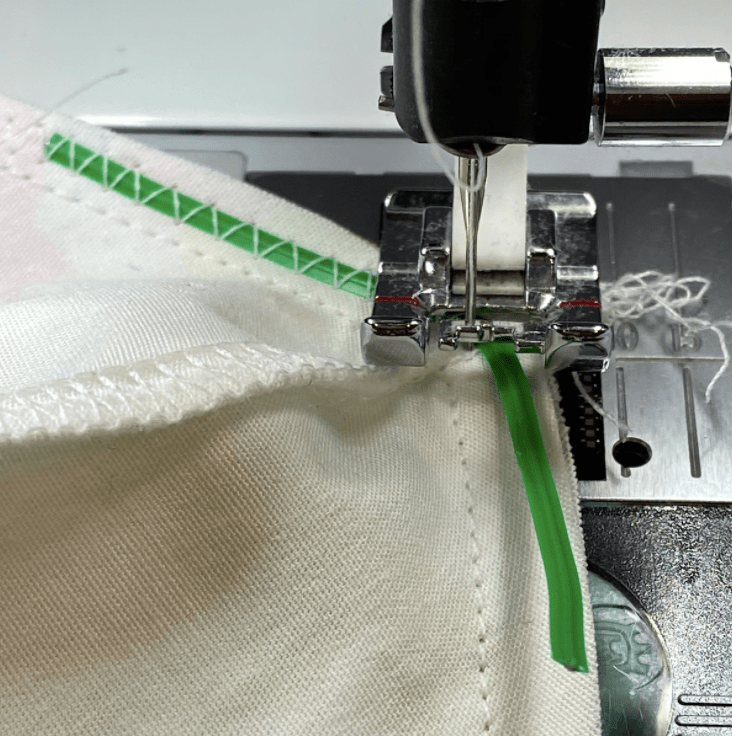
Step Nine – Add the wire to the top seam allowance
Place a 3-4” length of wire evenly over the seam allowance for the bridge of the nose. Zigzag over the twist tie, making sure your needle does not hit the wire (you may need to adjust your stitch width). Stitch to the top of the point.

When you get to the top of the point, leave your needle down and pivot the mask to line up the other side of the point. Continue stitching in the seam allowance until you have reached the end of the wire.
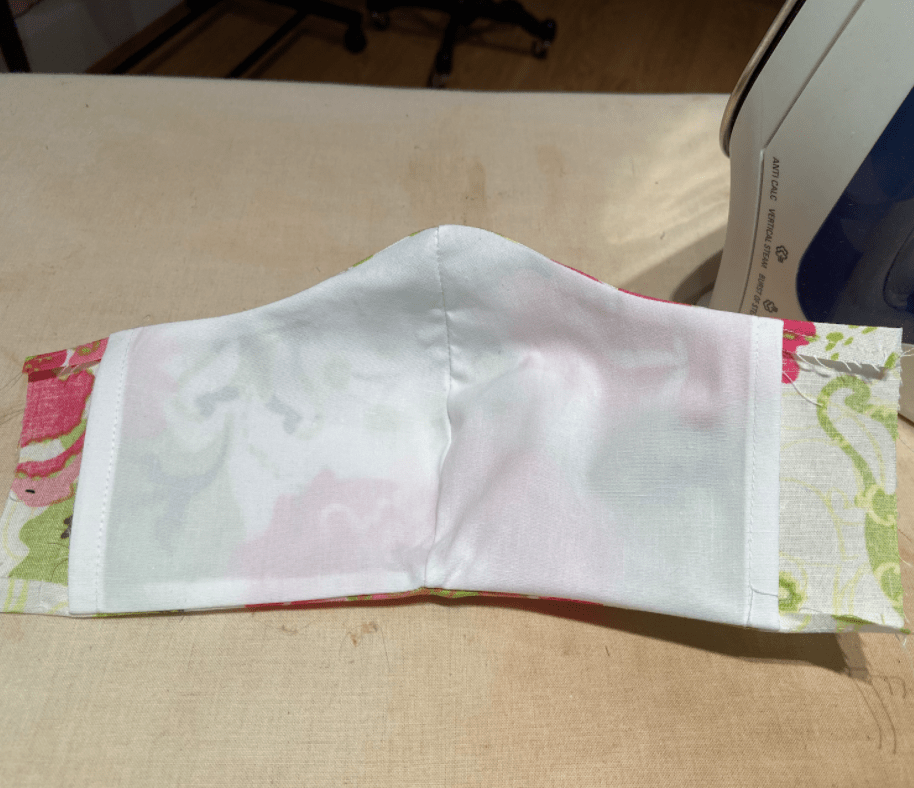
This is what the finished seam will look like.

Step Ten – Turn it right side out
Turn the mask right side out. As you turn the mask, shape the nose wire.

Step Eleven – Press top and bottom
Press the mask along top and bottom seams. Turn under ¼ inch on outer layer top and bottom.
Step Twelve – Press ends of outer layer
Turn under ¼” on each end of the mask sides.
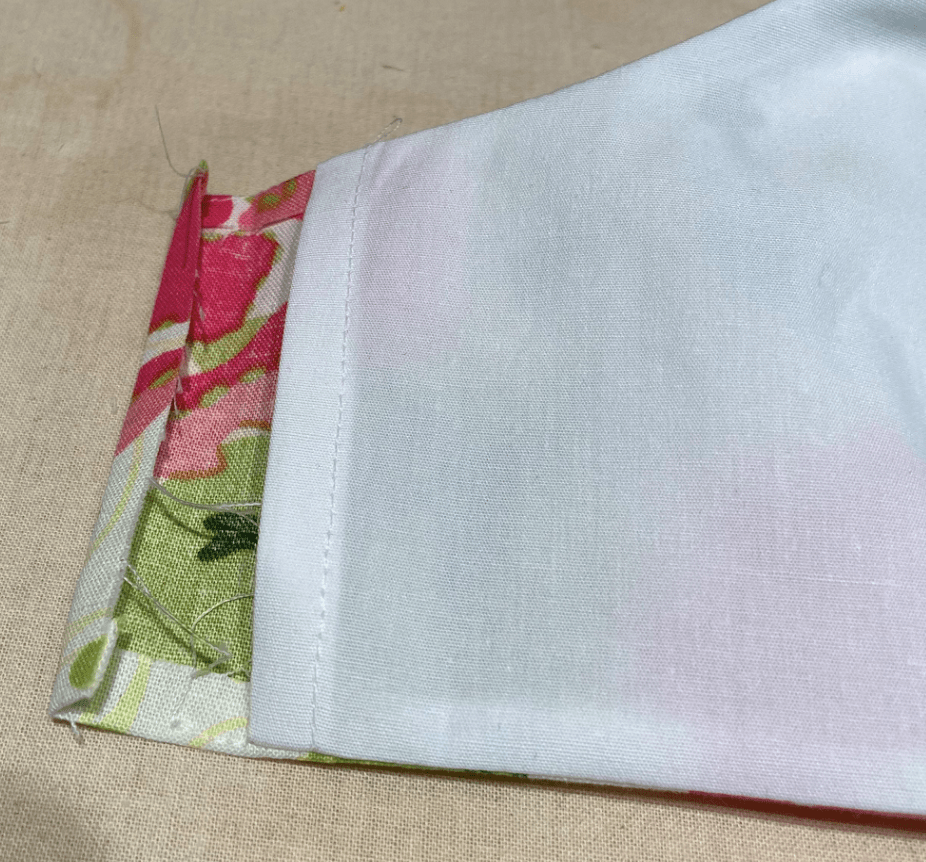
Stitch where you have just pressed using a straight stitch or zigzag.
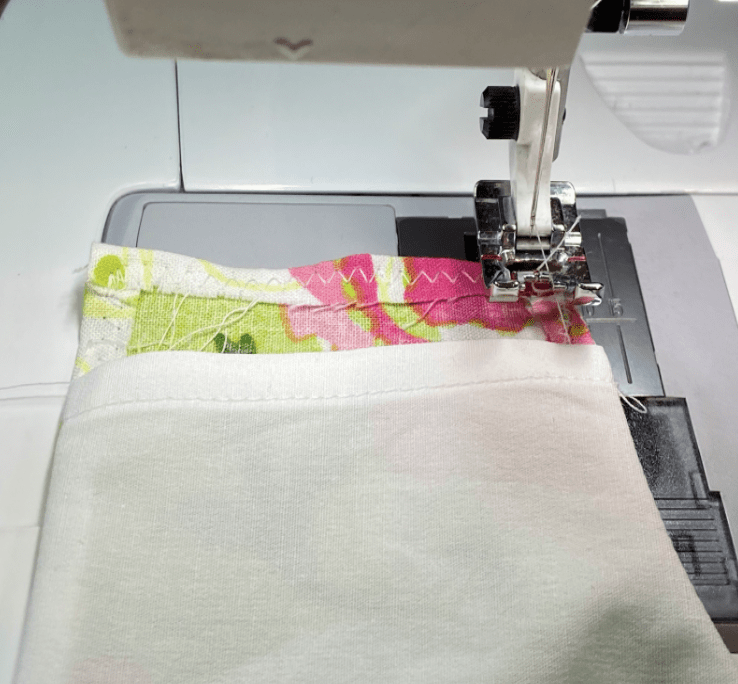
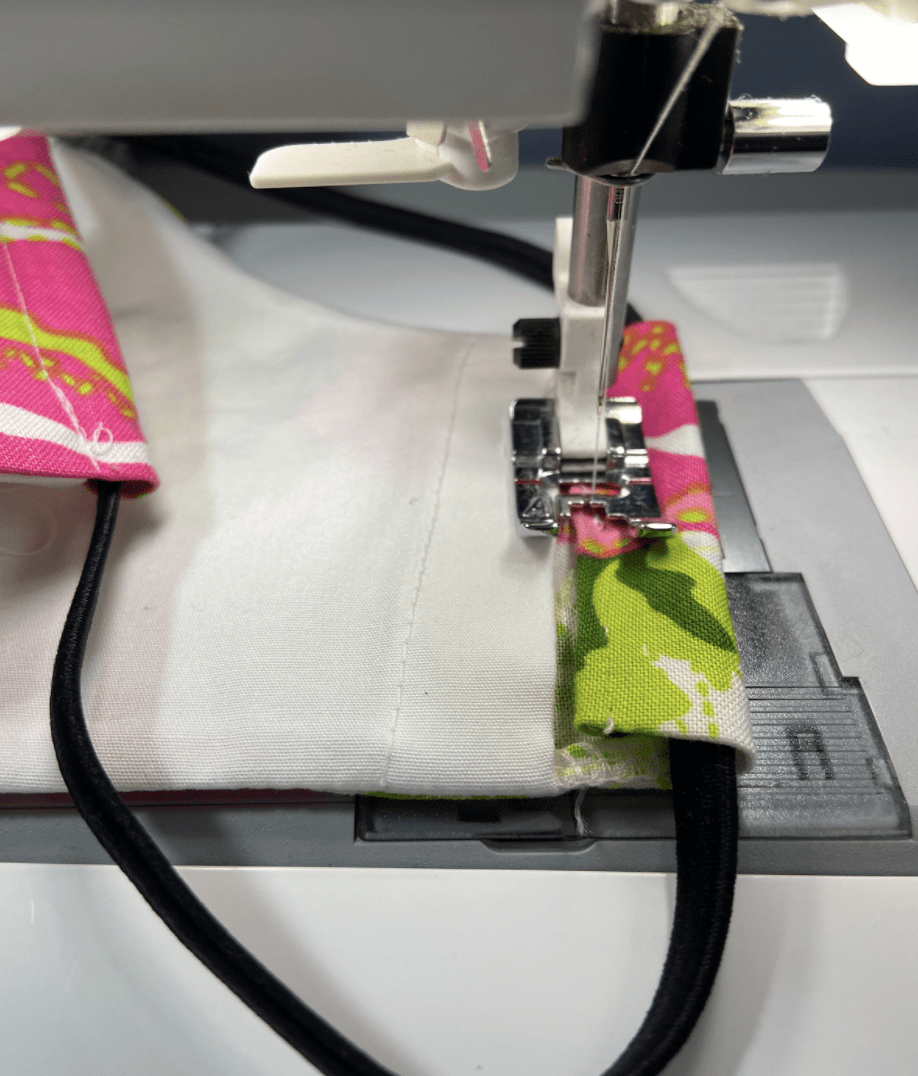
Step Twelve – Casing for elastic
Finish the outer layer by making a casing for the elastic. Turn the outer layer to meet the lining, keeping the lining free. Stitch the casing, being careful not to catch lining, as this is the opening of the pocket for your filter. As a time saver you can lay elastic in before you sew the casing. Shown here is a “headwrap elastic headband”, that rests on the back of the neck.
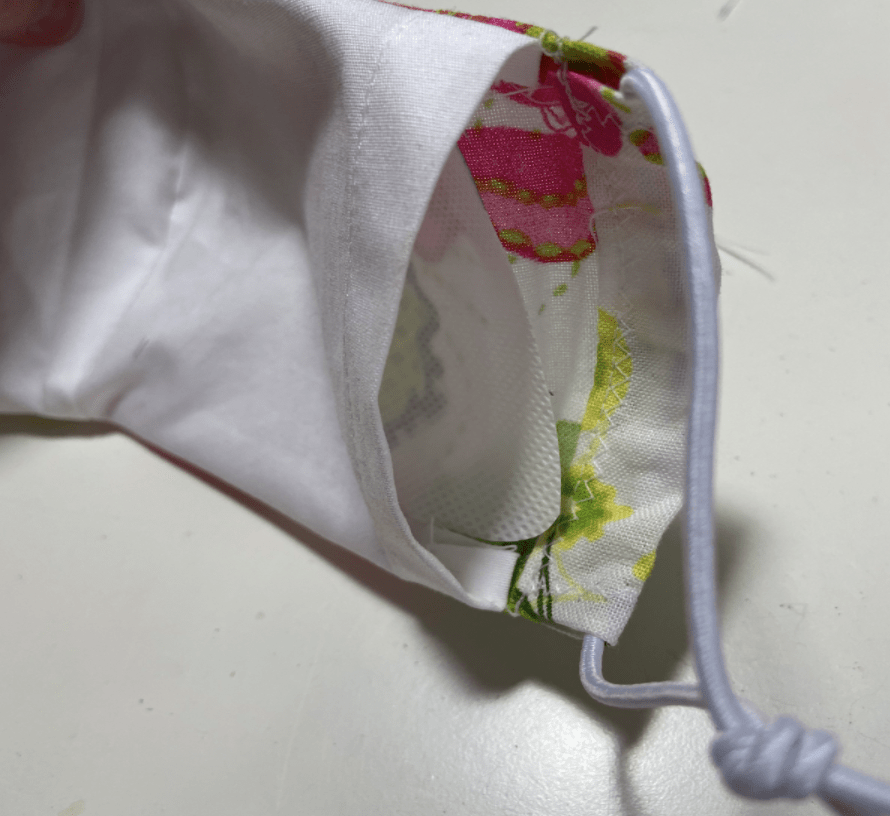
Another Option: Make Ear Loops
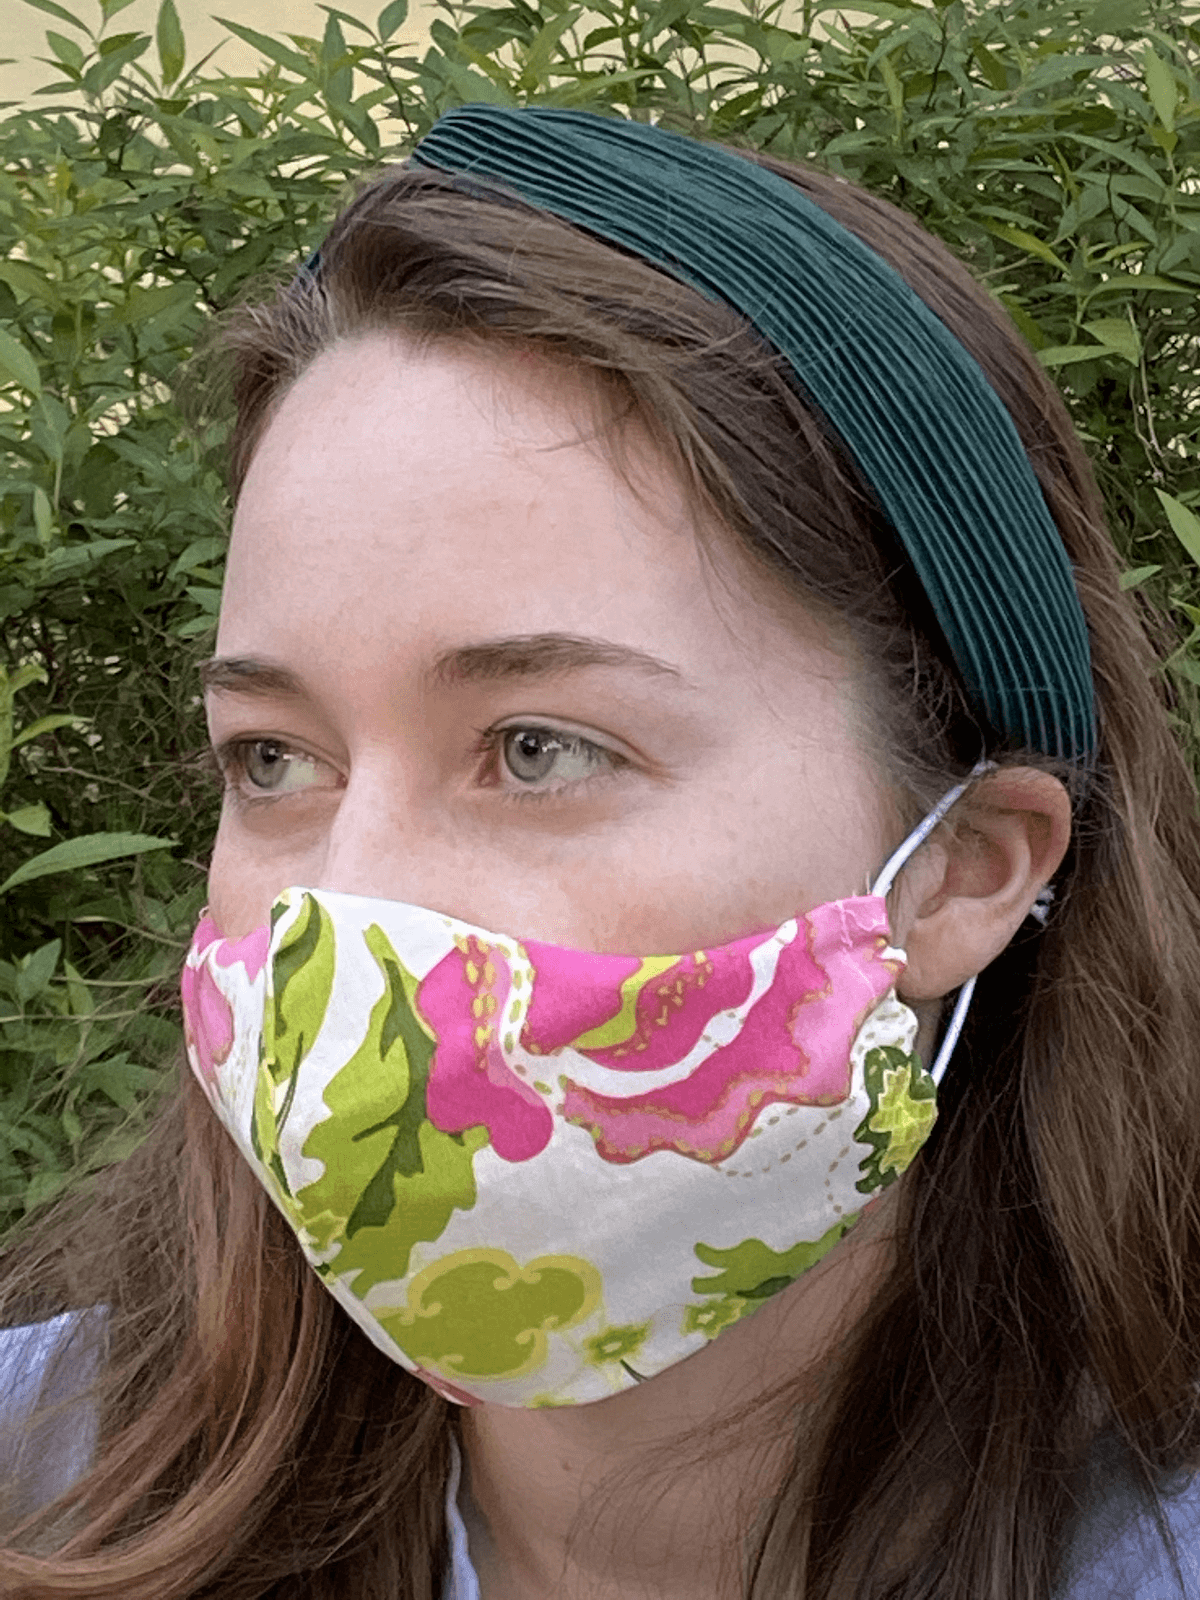
As an alternative, you can make ear loops by inserting 9-10” of elastic through each end of the casing. Tie ends of elastic lightly into loops. Adjust knots as needed. It should fit snugly but not be tight or pull on the back of your ears. What works? ¼” flat elastic, ⅛” elastic cord, stretchy jewelry cord, or rubber bands.
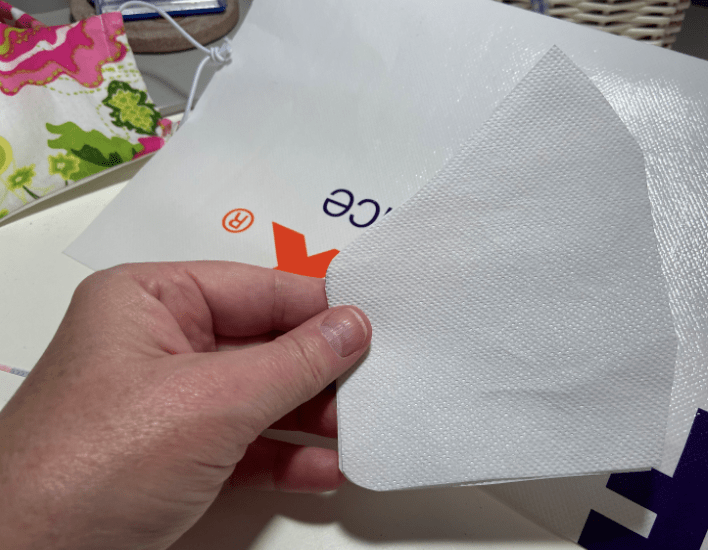
Step Thirteen: Make your filter
You can increase the filtering capacity of your mask by making a filter out of a non-woven polypropylene shopping bag. The bag should have a fabric type feel on both sides. Cut out the pattern piece C and stitch together along the curved seam only.
We also have a whole set of instructions on how to make a multilayer filter, follow the link to the right>
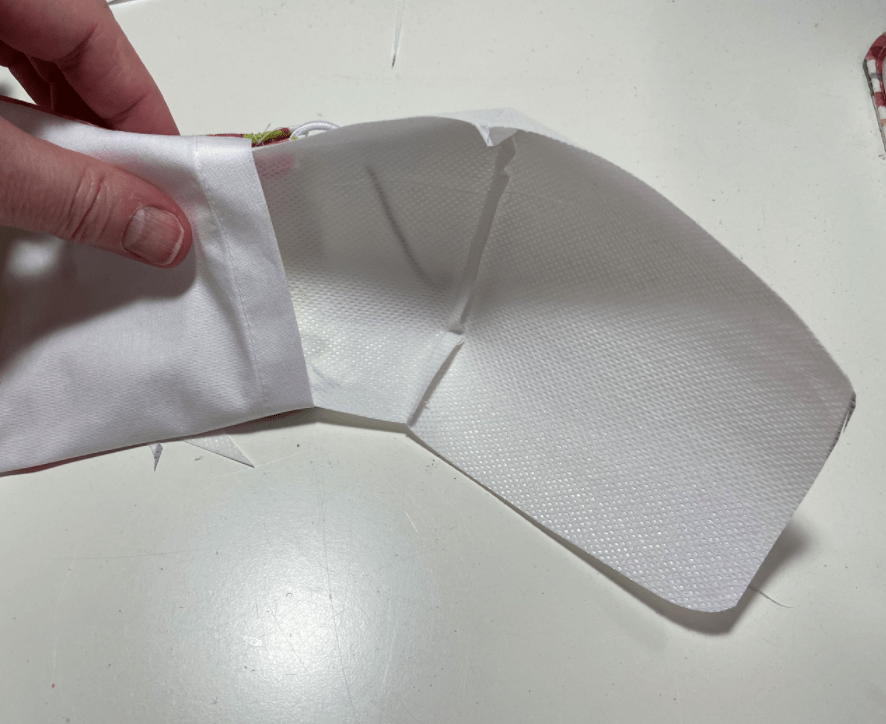
Step Fourteen: Insert the filter into your mask
Slide this material into the pocket between the outer layer and the lining. The entire mask can be machine washed and dried, but you will need to remove the filter after washing to air drying.
Step Fifteen: Shape your mask and adjust the fit
Follow the Face Mask Fitting and Use Guide to make sure you are effectively using your mask to protect yourself and slow the spread of COVID-19.